Friday, June 27, 2008

"I pledge allegiance..."


This was a fun card to make using a variety of stamps and punches. The checked border stamp and the primitive star in the center are from Cornish Heritage Farms. A few posts ago I posted a primitive card using other stamps in this set. If you like primitive art and would like to incorporate it into your stamping, I encourage you to check out Cornish Heritage Farms. This set of stamps is from their collection called The Rummage Bin.

The Pledge of Allegiance stamp is from Stampabilities.

Thanks for stopping by.

Sweet Biscuits for Strawberry Shortcake


My mother makes the BEST strawberry shortcake. She doesn't serve it on angel food cake or those little spongey cup things they sell at the grocery store. No way! My mom makes sweet biscuits and it is the best strawberry shortcake I've ever eaten. My husband feels the same way. He had never had sweet biscuits for strawberry shortcake before and, in fact, never cared for strawberry shortcake because he didn't care for the spongey cakes he usually had it on.


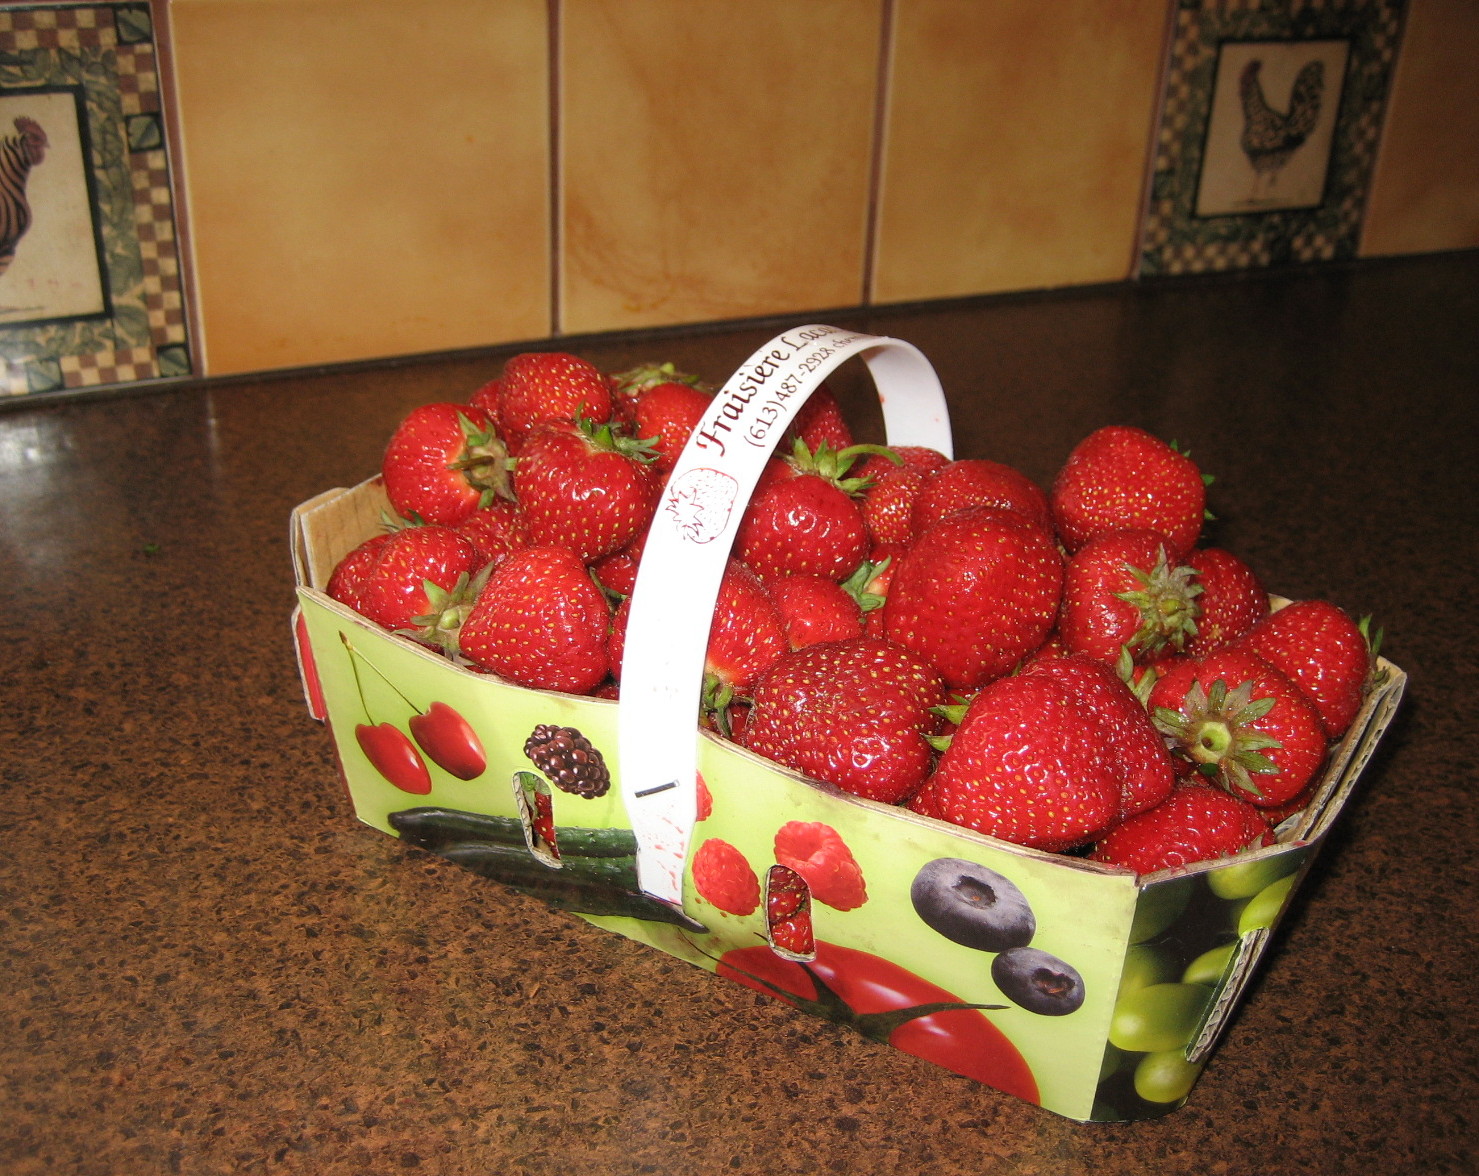
The strawberries are ripe now and I bought a basketfull yesterday and wanted to surprise Paul with some strawberry shortcake for supper. I couldn't find mom's recipe so I searched the internet for sweet biscuit recipes and I found this one that is very, very tasty! I think these biscuits would be good for breakfast or as a snack with jam or jelly.


The recipe is very simple and as they say, "nuthin' says lovin' like somethin' from the oven." In case you'd like to try it, here it is:

2 cups all-purpose flour
1/4 cup all purpose flour for patting out the dough
1 teaspoon salt
1 tablespoon baking powder
3/4 cup powdered sugar (icing sugar)
1/4 lb ice cold unsalted butter
3/4 cup of half and half cream

(1) Preheat oven to 400 degrees.
(2) Combine dry ingreients
(3) Cut in butter
(4) Stir in liquid until it just begins to pull from the sides - it WILL be pretty moist.
(5) Spread 1/4 cup flour on a pastry board and dump the dough onto the flour
(6) Gently turn the dough until all sides are covered with flour
(7) Kneed by gently rubbing the dough into the flour a scant 8 to 10 turns
(8) Pat dough into a 1 inch slab
(9) Cut into rounds with a sharp round biscuit cutter. You can push the scraps together to make a few more but just try not to knead your dough too much
10) Place on insulated cookie sheet about 1/2 inch apart
11) Put in HOT oven and bake for 12 - 15 minutes


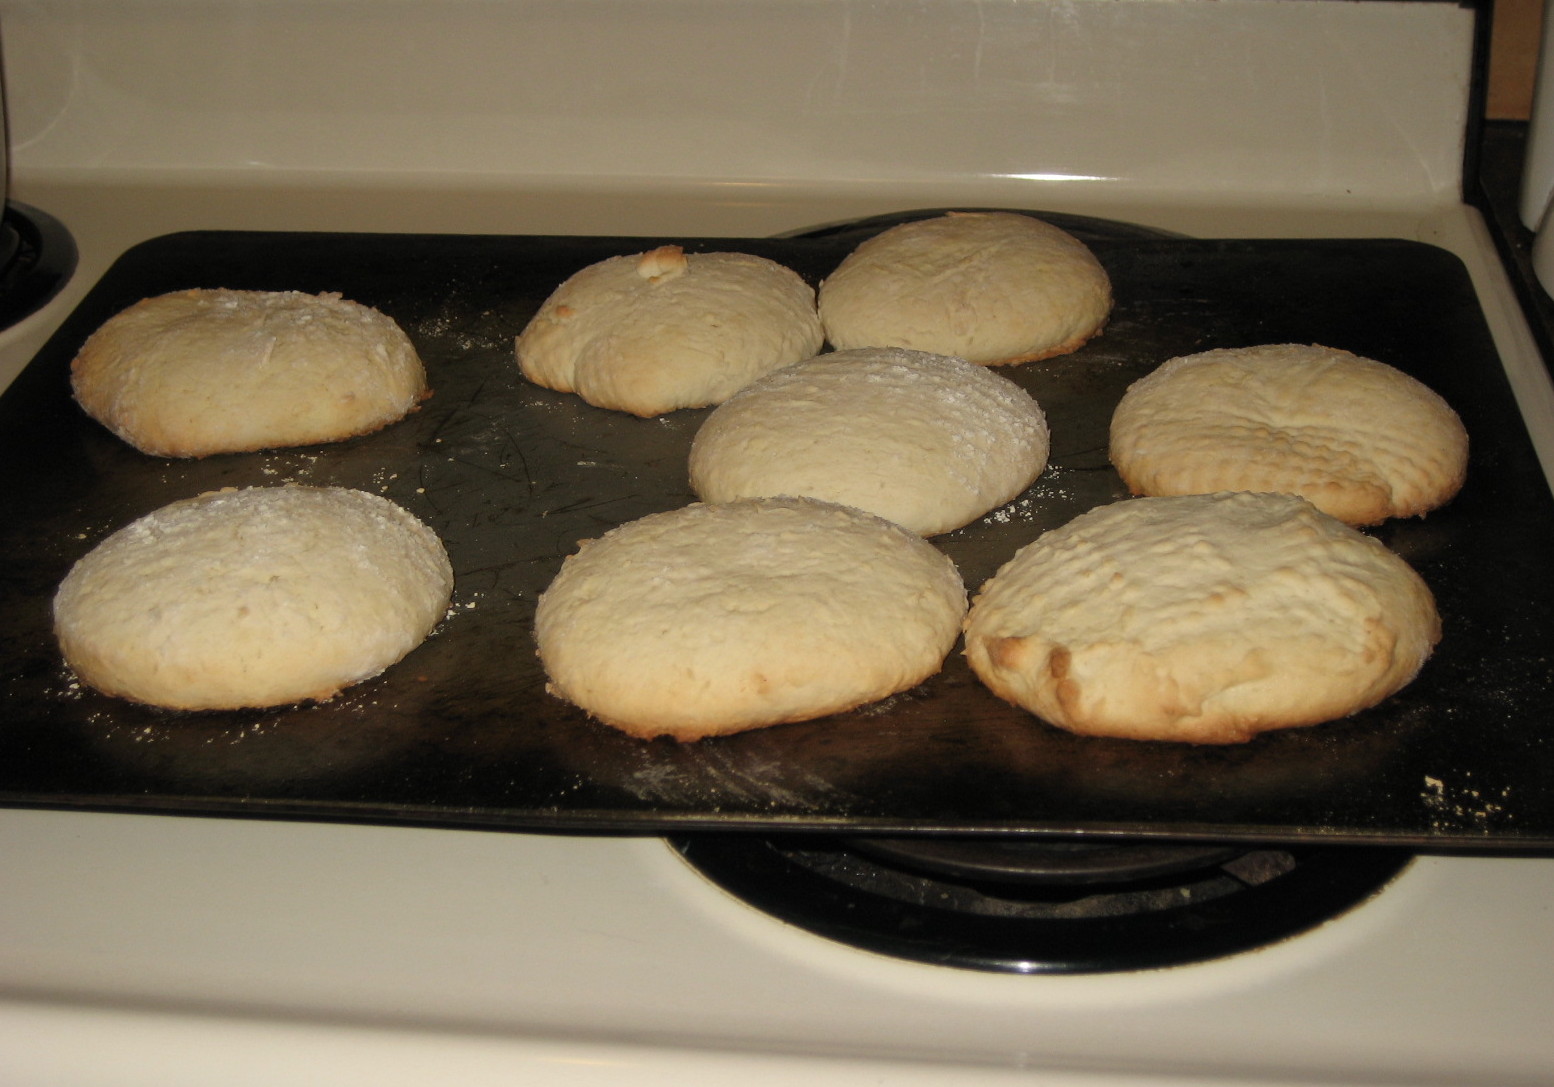
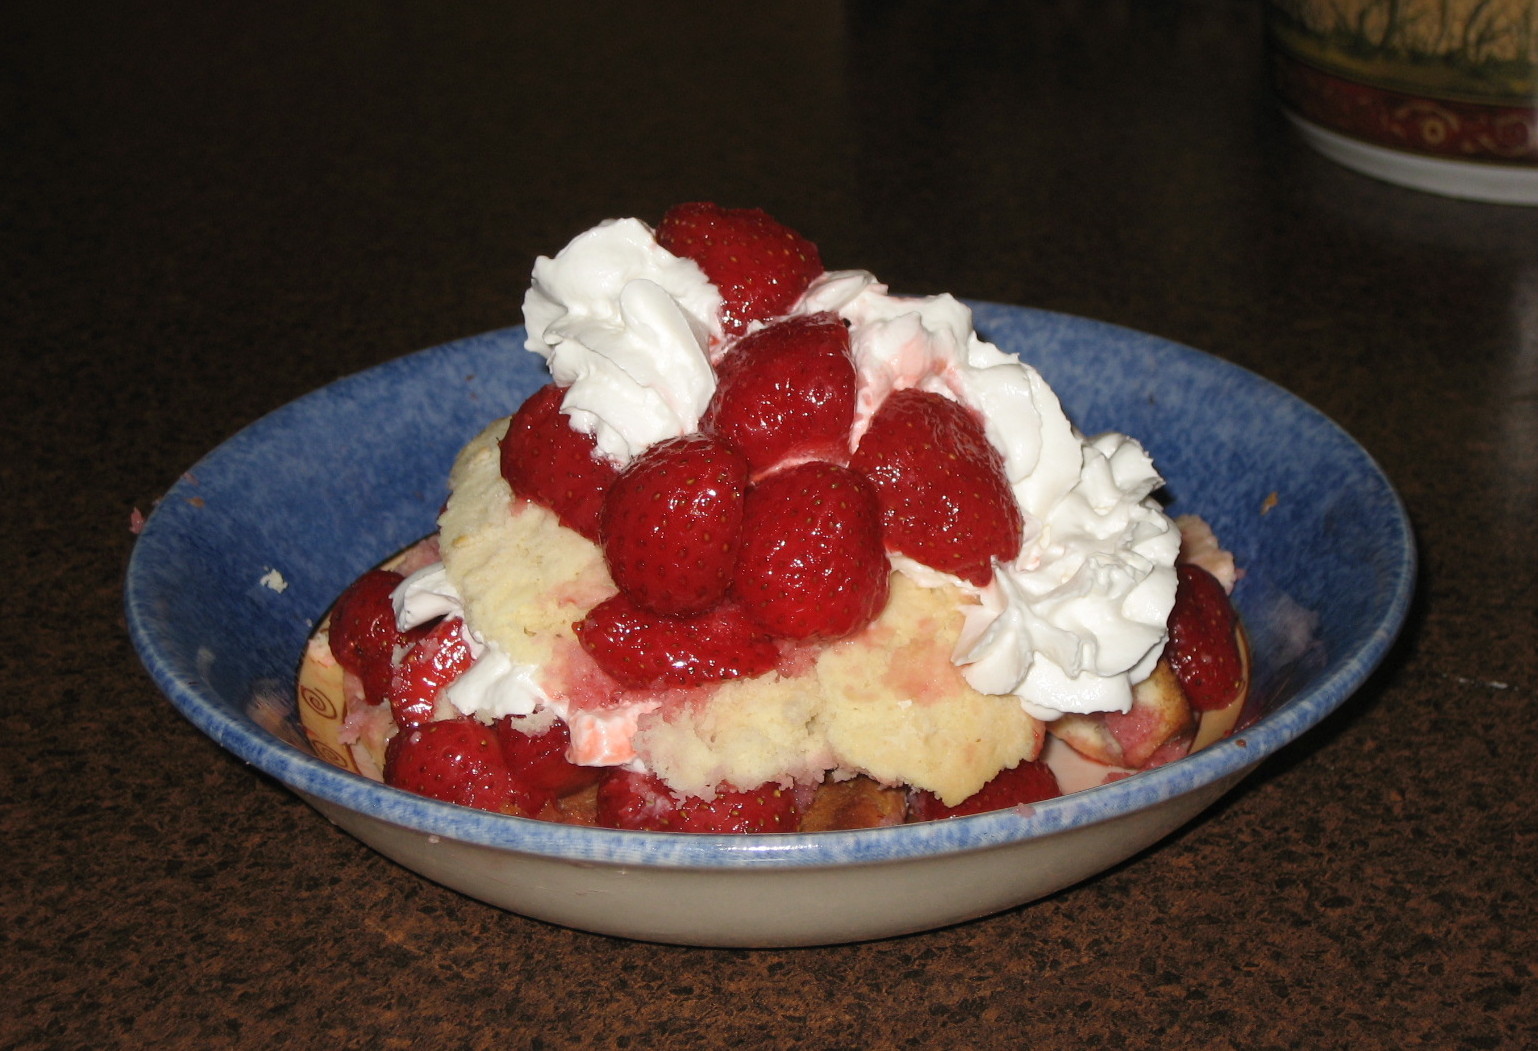
VOILA! Sweet biscuits. They actually look like very large, puffy sugar cookies and not as much like a biscuit. But yuuuuuummmmmy...when you break or slice it in a bowl, add fresh strawberries and top with whippy toppy...mmmmmmm.


Bon Appetit!

Thursday, June 26, 2008

America


It is almost time to celebrate Independence Day in the U.S. and I decided that this year I'd make and send a variety of Independence Day cards using various patriot stamps, papers and embellishments on hand.


This sentiment stamp is from Inkadinkadoo rubber stamps. I rarely just stamp sentiments without some type of image but I don't think this one needs anything else. Lately I've been admiring so many talented paper artist's work who incorporate stamping on the inside of their cards as well as the envelopes. It is such a wonderful finished and professional look so I'm experimenting with small inside embellishing as well as the envelope. I'm not sure if you can see from this side view photo but I've used one of Michael's $1 bin sets (July) and used the CELEBRATE stamp from it. Also I got out a tiny star punch and punched the corners.


More patriotic cards to follow. Since I'm mailing to the U.S. from Canada I need to get them in the mail.

Wednesday, June 25, 2008

We may not have it altogether...


"We may not have it altogether... but together we have it all! Shhhh...don't tell my husband but this is the card I've made him for our 6th anniversary which is coming very soon. The inside of the card shows the rest of the sentiment.


I knew I wanted to use this stamp and sentiment for my card for him but it wasn't until I saw to challenge blogs that my layout and design came to mind. This week's OUR CREATIVE CORNER challenge is to make a card using buttons and brads. This worked out perfectly for this stamp and sentiment!

And then on Julee's blog, POETIC ARTISTRY this week's Mojo Monday 43 layout sketch challenge seemed to fit this image to a "T".

I just love this stamp image and the sentiment too. Both the stamp image and sentiment stamp are from HEATHER's STAMPING HAVEN in Ottawa, Ontario. I watercolored the image with Tombow markers. I added just a touch of stickles glitter glue here and there for a tad of sparkle.

Whew...I managed to work two challenges as well as finishing my husband's anniversary card all in one card. Hope he likes it.

Friday, June 20, 2008

Another Happy Mail Day


What a treat I had today when I went to my mailbox. This beautiful card from Leanne was waiting for me in my box! Isn't it beautiful?! You can see more of Leanne's fabulous work on her blog, WEE INKLINGS. Leanne also enclosed lots of beautiful images for me to color and use on card.

Thank you so much, Leanne. I just love Happy Mail Days!

Thursday, June 19, 2008

Follow your Dreams


I've been wanting to make more long and tall cards and I just don't know why it take challenges to spur me on to do them. Oh well, I finally got off my duff and made this one for the World Stamping Week challenge on 2 Peas in a Bucket. The challenge called for a long and skinny card measuring about 4" by 9" that will fit in a business size envelope.

Also, on CPS this week, guess what the layout sketch was? Yep! It too was for a long and tall card. So I used the CPS sketch and made my "follow your dreams" baseball card for both challenges following this sketch:

I used a baseball collage stamp made by Paper Inspirations. I tried many different colors of ink and background colors for this card. Finally I decided to stamp in black and emboss it and not do any coloring on the image with the exception of the stiching on the baseballs. I like how it looks. The red dot background paper is from Stampin' UP! and I used my cuttlebug swiss dots embossing folder for the blue background. The neat Baseball brad is made by a company called Hot off the Press. I've had the printed grossgrain ribbon which says follow your dreams forever and have never used it so this just seemed perfect. The red grossgrain ribbon was a little piece in my sewing machine drawer that matched well so I grabbed it for this card.

VOILA! My tall and skinny card for WSW: Long and Tall Challenge as well as this week's CPS challenge # 69.

Thanks for looking.

Wheelbarrow Ride


Another one of my new Gruffies stamps. This is called "Wheelbarrow Ride." The image is colored with Prismacolor pencils. I used a bit of Gunmetal Stickles glitter inside the flower pot. You can't see it in the photo but I've found that if you have a garden themed card and want some fun "dirt" that the gunmetal color makes sparkle-y and gritty dirt.

The background paper is Anna Griffin and the flower slider charm is from Maya Road.

Thanks for stopping by on this very rainy Thursday.

Wednesday, June 18, 2008

A happy mail day!


LOOK at the wonderful mail I received today from Jacqueline! I had admired the postcard Jacqueline made on her blog, My Scrap Basket and Jacqueline sent it to me! I'm truly thrilled to find such happy mail all the way from France from such a talented artist. And not only did Jacqueline send me the postcard but also this beautiful card. It just so happens that when I received my latest issue of The Stamper's Sampler I saw one of Jacqueline's cards like this in that issue.

Jacqueline, thank you so much! They are even more beautiful in real life and I'm honored to have them.

Don't you just love Happy Mail Days?!!

Tuesday, June 17, 2008

Home is where the heart lives.


I love Primitive Art. On the walls of my home hang prints of Jane Wooster Scott, Charles Wysocki as well as Warren Kimble. When I discovered that Cornish Heritage Farms had made and produced these primitive art stamps I didn't have to think twice about ordering them. When they arrived, I was not disappointed.

As I've mentioned before, I'm not real good at creating stamped scenes but I have to admit that this was a lot of fun. It required a lot of masking and various colors of ink on the same stamp while trying to maintain a muted and primitive look.

I'm pleased with my first card using this set. I have a couple more drying on my work table to post in a day or so. I thought this card would be nice for someone who's just moved.

Until next time...

Celebrate


This week's Mojo Monday sketch challenge (presented on Julee's blog, POETIC ARTISTRY) is a fun one. At first I over complicated the layout and couldn't figure out how to make it work. Then, as chance would have it, I was picking up some scrap designer paper and suddenly I knew what stamp would be perfect with the paper and Julee's layout would work perfectly.

Here is this week's Mojo Monday #42 sketch:

I used an old Stampin' Up stamp set entitled "Send a Celebration." I think the firecrackers don't need a lot of coloring work on them so I just used gel pens and stickles for the festive coloring. It was perfect luck that I had just three red star eyelets for the side design element. Inside the card I stamped a little star swirl. I've seen more an more cards lately that have stamped small embellishment inside the card and I really think that gives a greeting card a polished look.


So, here is my Mojo #42 card.

Thanks for stopping by!

Monday, June 16, 2008

Dick, Jane and Sally


Do you remember reading Dick, Jane and Sally primers in the first grade of elementary school? I sure do! I was not a very good reader as a child. I liked to read, but it was a slow and painful process. The little Dick, Jane and Sally books gave me my first start to the love of literature despite my difficulties.

I was looking at fabric online and was so excited when I found this print. I also bought some Dick Jane and Sally panels that I'd like to use for a tote. And another piece of fabric from the same line is the Dick, Jane and Sally text in the very same font as the reader books were. I'm looking forward to using those too.

But on to this apron. I made this in about 2 hours this afternoon. It wouldn't have taken that long had I not gone overboard on rick-rack, buttons and trim. I wanted to make this smock apron for grooming the dogs. My dogs are "blowing coat" right now and I'm covered in dog hair. I also wanted something to have the combs, brushes, clippers, rake close at hand and these pockets are great.

So while this is an extremely simple (shall I call it "elementary") apron, it is most definitely functional and fun.


Sunday, June 15, 2008

My First "Our Creative Corner" Challenge


This is my card I made following the layout challenge for the newly formed "Our Creative Corner" team's weekly layout challenge.

This week's challenge sketch seemed like a perfect opportunity to ink up this Stampin' Up! stamp from the set called "Bloomin' Beautiful." I painted the flower with Twinkling H2O's.

This is the layout presented by the team.

It is getting ready to thunderstorm and has really gotten dark outside. Hence, my photograph is a bit dark. The color of the flower in real life is much more vibrant yellow than this photo appears.


I'm looking forward to the OCC weekly challenges to come.

Thanks for looking!


Friday, June 13, 2008

My Posies

Having such long harsh winters here in the Ottawa Valley of Ontario really makes one appreciate the flowers, birds and seeing colorful plant life in all varieties in the summer. I just thought I'd share a few photos of just a couple of pretty things:


How would you title your Memoir?

I'VE BEEN TAGGED by my friend, DEBORAH who lives in Nova Scotia. She asked me what would be the title to your own memoir, if you were to write one? Deborah said,
"Mine would be Carpe Diem...Latin for Seize the Day.

So now it is my turn to choose a title for my memoir. Hmmm...I've been thinking about this for a couple of days. I wouldn't even begin to give my children, siblings or husband the opportunity to title MY memoir. I'm sure they'd all come up with something creative! Hee hee hee!

OK...so after much thought, I'd call mine, Does my Harley Sportster make my derrière look big? Actually, that is my working title for an article I'm writing for a motorcycle column about older female riders of motorcycles. But this title has more to do with always trying new things and adventures. Frequently (almost always) when I try new things, there are and always have been some type of comical moment(s) in my adventures. And, this was actually the question I asked my husband the first time he rode behind me on my motorcycle. He just rolled his eyes, laughed and answered the appropriate response of, "Of course NOT, Skippy!" (He always calls me skippy, thus the origin of my cries of "yippee skippy!"

So now I tag a few of my blogging buddies JAN from Alaska (FAR NORTH DESIGNS), ETHEL (THE PAPER QUILTER) from Nebraska and TAMI (DAPPLE DESIGNS) from California and ask the same question of you, what would you title your life's memoir.

OH, and ladies, be sure to link back to this post after you post your response because I want to know what your titles will be.

"INCHIES" challenge

Each month, my good friend JAN, of FAR NORTH DESIGNS, and I alternate offering a technique challenge. Jan is, without a doubt, the most creative and talented paper artist when it comes using creative technique on paper artwork. Our challenges are far more for my benefit to step out of my little tiny box of papercrafting and to try new things.

This month it was Jan's turn to choose our technique and she chose INCHIES. Anyone who knows me (and Jan knows me!) knows I don't work well on little canvases. I do not do ATC's (yes, I have tried them) and I never got into the "Inchie" craze. This is why Jan is so good for me. We each made 2 sets of 6 inchies and then exchanged one set with each other. Then, the challenge was to display our inchies in a little album or mini book using spring and/or flowers as the theme. Without further ado, this is my inchie book using Jan's and my inchies.


I'm off to check out Jan's blog to see her inchie album using our collective INCHIES.

Happy Spring and happy gardening too!